Tuesday, 28 June 2016

Chicago Tugboat: Making Your Own Decals


Sometimes, you meet an unexpected hardship at the very moment you thought the worst was behind you. When I started to build the Walthers tugboat kit, I was pretty sure painting and assembly would be where would lie my best efforts. So much for that foresight! The decals proved to be a big challenge.


The decals provided with the kit are utter garbage and worthless. The decal film is thick as an acetate sheet which makes it impossible to stick decently to the model thus enabling a lot of air to be trapped. Rejoice! Except for the Erie logo, the ship name plate is too small and unprototypical and only one is provided while there were 3 of them on the wheel house. To make things worse, they didn’t provide the white ship name lettering painted on the hull (I need four of them).

As you can expect, I was in a pinch. I decided to try my luck with the decals, but the results were extremely bad because the white decals are translucent. Imagine, it’s a brand new paint job and the logo is badly faded! I had to remove the decal the hard way, sand the part and repaint.

It was time to look for suitable decals. Unfortunately, Erie decals for tugboats don’t exist. I thought about using freight car decals but I was a little bit worried their size could be quite off, particularly on the wheel house were space is premium because I shortened it to represent a Harlem River tugboat.

There was only one option: make my own decals. My printer can’t make white or brass-color decals. With some creativity, I decided to spray transparent decal sheets with white and gold paint. Then print black decals on another decal sheet. The next step was to merge the decals together by applying the black artwork on the coloured decal. As crazy as it may sound, it worked far better than I thought. Sure, the decals are a little bit on the thick side (2 films + ink + paint + dullcote) but far less than the stock Walthers ones.


Three sheets of decal ready to be merged into a single one.
 

Application was easy since the decals lay on flat surface devoid of rivets. Now the model is correctly lettered according to prototype and I can move forward with the project.


The next big challenge will be to print the white lettering on the hull… the letters are white on an olive green background. I could use a friends color printer and apply the decals on a white background like I did with my previous decals. Or I’ll simply print them black and white, paint by hand the black with olive paint and merge everything when doing the final weathering (which was particularly heavy on the hull).


Tuesday, 21 June 2016

Completing the Gantry Crane

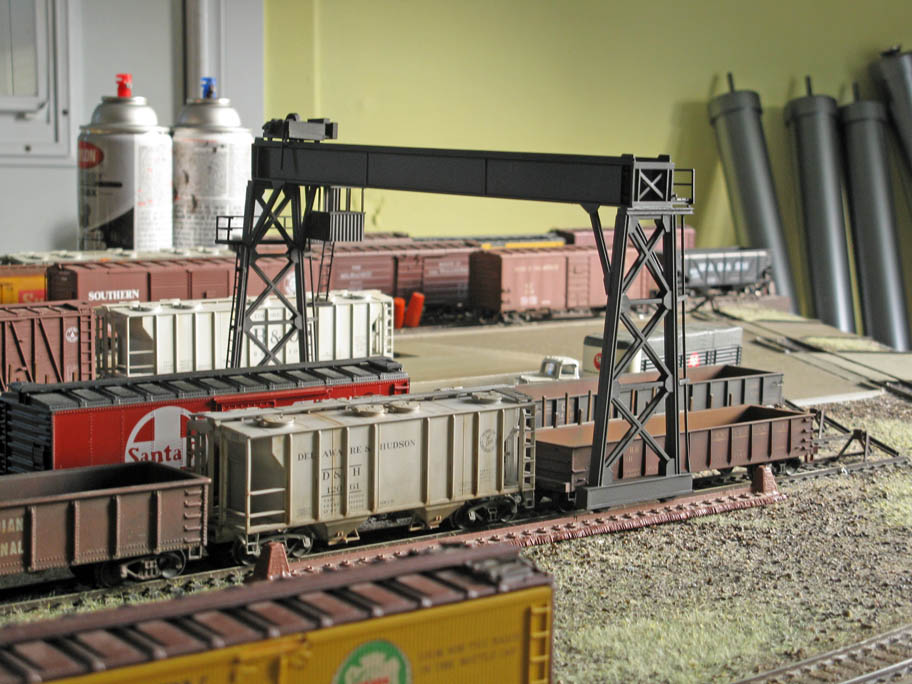
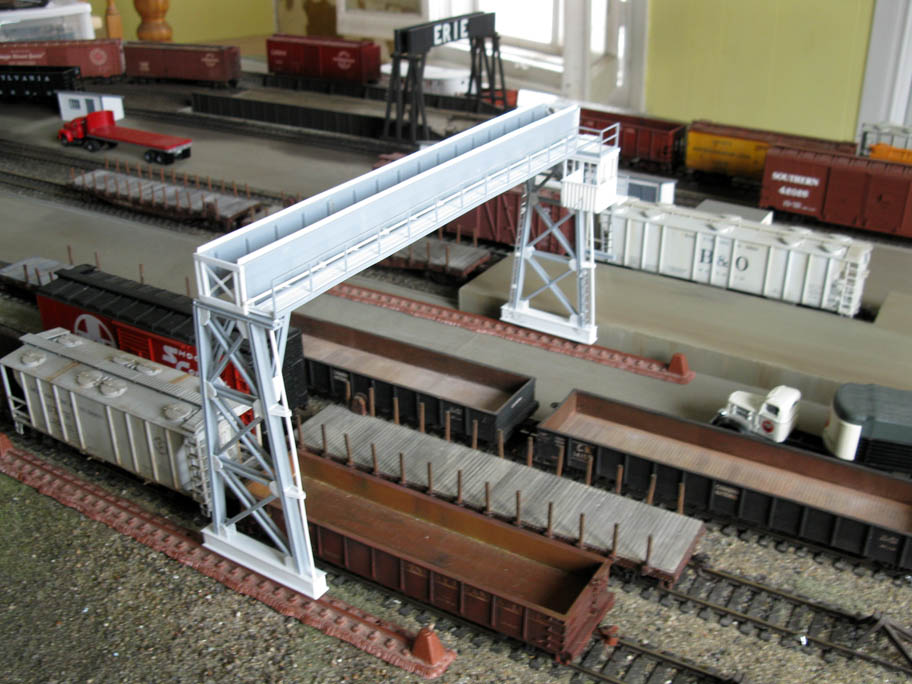
The project is now fairly completed with the addition of a hoist carriage made of several bits of styrene. A first base coat of Krylon black and camouflage brown was sprayed and will give foundation to the weathering.

I can now move on with other projects such as the tugboat and freight station.


Sunday, 19 June 2016

The Birth of a Gantry Crane


I'm always surprised how very generic rail-related structures are almost impossible to find on the market. Looks at manufacturers catalog and you won't find a decent-sized gantry crane. None. Too small, Europeand design or the large ones on traveling on beam structure. Look for the ubiquitous model, there's nothing.


So I resorted to kitbash one using parts from a Walthers conveyor kit. I could have entirely scratchbuilt it to be 100% accurate, but I didn't want to go that route. I want a decent representation of Harlem Station gantry crane, not a prize-winning model. Everything came from the junk box, including Bachmann plastic wheel sets (yes, they do have a purpose in life other than be discarded!).


I also followed an article in Model Railroader about a similar structure which made my life easier interpreting the picture of the prototype. I'll be honest though... I made what I could to create a believeable mechanism but did go as far as the article. It has the look, but upon closer inspection, the illusion will fall apart if you know how cranes work!


After two days of intense work, I've been able to build the structure. The last thing to be done is the crane motor and hook... and some painting of course.


I'll also have to had two rails on the layout for the crane. I'm not yet decided how I'll do it, but it will probably be some code 100 scraps of flextrack.

1 Concrete Ramp & 4 Grade Crossings

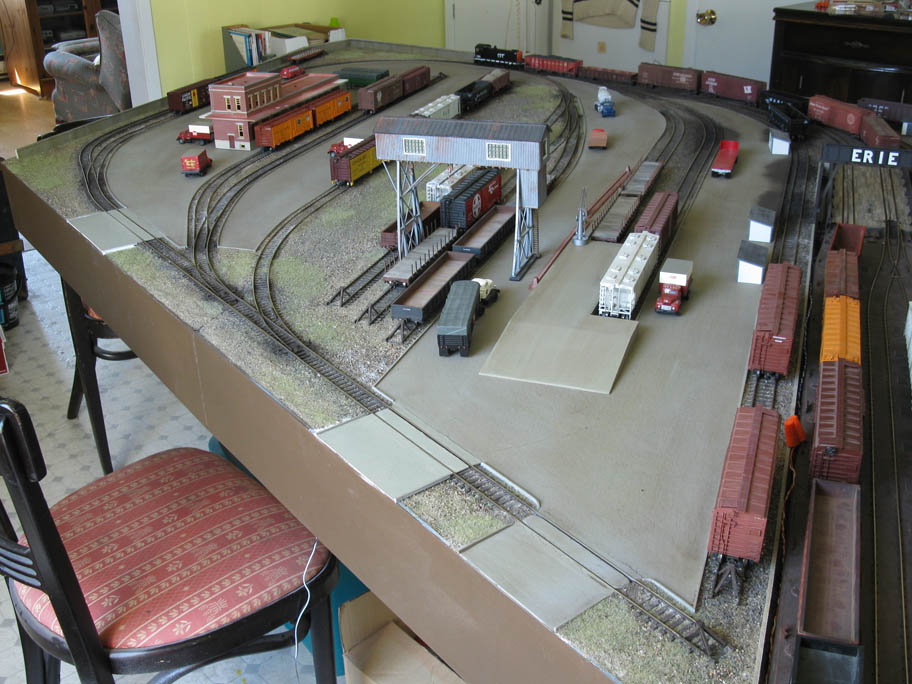
As promised, here is a general overview of different new upgrades on the layout. As you can see on these pictures, the layout is now in its second operation session.


A new styrene concrete ramp now graces the twin team tracks. It follows the prototype as closely as permitted by source material.


Also, two new grade crossings were added according to recent discoveries. They aren't yet weathered and ground cover isn't yet complete.  Also, a third wood and dirt grade crossing will soon be added in front of the freight station.


Finally, another improvement was the addition of coal dust spills over the concrete ramp following prototype picture. They truly help to kill the fake look of concrete and I'm planning to add a little bit more weathering in the long run.


I also started to work on the gantry crane. It isn't an exact replica of the real one at Harlem Station because I did want to use parts I had on hands. However, it follows the general lines and I believe it will work as a decent model.

Sorry, the workshop is a real mess right now!

I'll probably use the same approach about the small coal dealers' structures to save on time and material. While I want the layout to be as close as I want, I still have a time limit to complete the project and Jérôme - the future owner of the layout - want a decent depiction of Harlem Station and not a prize-winning museum model.

On the good side, I found some old suitable models to populate the layout. I still need Erie boxcars thought!

Friday, 17 June 2016

Grade Crossing Festa?

 I once thought until last year only one road access on East 150th Street existed. Photographic evidence quickly demonstrated another one existed on the service road parallel to 149th Street bridge near the pier.

Then Chris revealed last week a third one in front of the station on East 150th Steeet. That made a lot of sense. However, as fellow modeller Jérôme tolf me when he visited, the trucks would have a hard time to turn around the team track concrete ramp. The problem is I didn't fudge the dimensions to fit my need. I followed the prototype and I'm pretty sure I'm not far from reality there.

But Armand Isip, another fellow modeller from New York City, was kind enough to contact me this week and provide links to archives documents available online at NYC Department of Records website.

Among the photos, a very precise city map emerged... and guess what? The grade crossing are drawn... not only three of them, but four!!!

As you may have guessed, the fourth crossing/access road was located right in front of the concrete ramp, eliminating the need for complex truck movements.

Harlem Station Map


Among the nice find are also a set of color pictures from 1983-1988 showing the freight station elevation on East 150th Street intersection. Now, there's absolutely no reason not to start working on this project. And once again, a big thanks to Armand for pointing out these interesting informations and it's a pleasure to share it among other Harlem Station modelers as he requested.

Harlem Station Freight House

Harlem Station Gantry Crane