Tuesday, 25 April 2023

Harlem Station For Sale

I haven't updated this specific blog for a very long time. As you may suspect, work on Harlem Station has halted as it reached completion and my interests focused on other projects.


The layout has been in storage in my house for some year, gathering proverbial dust and not being used. Since I'm about to remodelling the house, I'm putting the layout for sale. If you want to own this piece of modelling replicating faithfully the Erie Harlem Station, please contact me.


The sale includes the layout itself, a carfloat, a tugboat, a kitbashed pontoon bridge and a transfer crane. Since the layout hasn't been used for a few years, expect the rails to need a good cleaning and maybe to solder some wires that could have go loose over time.


Asking price is $850 CAD or $625 USD. To put it in context, this amount barely covers the expenses to acquire the materials and kits to build it, so it's a quite a deal. Also, I can't provide no means of transportation (I have no car), hence the reason why I'm selling it for such a low cost.


Size is about 5' x 7' and the layout can be split in two modules for ease of transportation. That said, if you can move it in one piece, it's for the better.


Feel free to contact me for any question!

Sunday, 2 February 2020

New Single Sheathed Boxcars Project (1929-1970)

Sometimes people come with great projects that can change your perspective on rolling stock in an era, bringing products that can provide some diversity into a well-known and loved era.

This is what Randall Hammill and his team at Prototype Junction are trying to do by fundraising the production of RTR plastic models of classic single sheathed boxcars, in particular, the ubiquitous ATSF Bx-11, Bx-12 and Bx-13 and other variation such as Rock Island, Pere Marquette, CGQ, L&N, C&O and others.


If you are into the transition era, it is quite likely you'll need these cars since they travelled all over North America... A few years ago, I scratchbuilt a few with old MDC OSB boxcars, but it was tedious and far to be accurate. Now, that would be a game changer since it would bring to life many models only available in resin kit, which can really put off many people.


To do this, Prototype Junction is doing an Indiegogo fundraising campaign. The goal is quite optimistic, but the rationale behind it does make a lot of sense since it is based on hard facts. However, like any social financing, the words must go out.

As Joe Fugate and others recently pointed out, contrary to what people would think, the transition era is still by far the most popular era. It seems steam locomotives, early diesels and 40ft boxcars do connect with younger generations. It's for this reason I think this project needs much more publicity because there is a customer base for it and "old geezers" methods would work to reach a younger crowd.

You can participate and find more information here:

https://www.indiegogo.com/projects/ho-40-single-sheathed-box-and-auto-cars-1929-70s#/

And take a look and discuss on their Facebook page:

https://www.facebook.com/groups/prototypejunction/

Disclaimer: I'm not a part in this project, only providing my own enthusiasm toward something of interest for me and wanting to encourage more people to enter the field of manufacturing so the offer can grow.

Tuesday, 25 September 2018

Toward A New Home For Harlem Station


While this blog isn't very active, Harlem Station is still going strong behind the scenes. The layout itself is now in storage waiting to be housed in a new hobby room I'm planning to build in my basement. Also, I've have continued acquiring rolling stock over the year to build up the fleet. It is my hope the layout will find its new home by Christmas Holidays if everything goes according to my plan... and we know life never follow plans!


Parameters


Trying to fit an island layout into a new room isn’t an easy task. No wonder this kind of design has lost favor of most modellers over the years. They quickly eat up space when you take into account decent aisles where an around the wall design would be much more compact. But reality is reality and Harlem Station is indeed an island design in real life. It couldn’t have been done otherwise.

Knowing that, I’ve started to look at my options and to better grasp the reality of the project, it was wise to set a few parameters that can’t be fiddled with. From the start, I decided to have aisles that would be about 42 inches wide. I know it is quite generous, but I’ve always felt the standard practice of 30” was a minimum rather than a recommendation. Operation is one thing, another is having enough space to work or build the layout… and to have enough space to contemplate our work. I see no point giving our best on a layout only to display it poorly.

Once I had to determine the layout and aisles footprint, I was ready to design the room. I know for sure I want an entire wall dedicated to my workbench, including a spray booth and a computer. I have an old desk about 60” long by 30” wide that serves me well for this purpose, so let’s consider we need a good 30” wide area for these things and add some more inches for the chair. Shelving and storage will be provided and several power outlets are required. Since the basement walls are stone masonry and can’t be hidden with new finishes, this modelling station should be located on a new interior wall to make my life easier with electrical wiring.

Another key aspect is the future Temiscouata Railway layout I’m planning to build in the future. This layout requires about 17 feet long to accurately replicate Connors, NB without any compression. This is a condition I’m not eager to sacrifice since I know longer believe compressing railway scenes when not required.

I have also some diomara ideas, but theses won’t require a lot of space and could be hanged on brackets over Temiscouata layout staging area.

A final key design element is that I have accumulated an extensive collection of rolling stock over the years and it is getting harder and harder to find a particular item among 300 or 400 boxes. If possible, I’d like to use the space under the Temiscouata layout as a storage area. It could be made of cupboard or shelving units where cars could be picked up easily. For Harlem Station, I’m thinking about using a small service table on caster to stage cars and store them under the layout.

Putting Things Together


Proposed hobby room layout

Architectural design, like any other design process, required a balance between technical requirements and aesthetics. Too often, we take a room and put a layout into it, not thinking how it will look. If Hedley Junction taught us a lesson, it’s that large aisle can truly make a layout stand out and that locating a nice scene on the peninsula, which grabs visitor’s attention when they cross the door step, is a mission statement in itself.

For my hobby room, I want the same thing. The layouts should command the area and be the main focal points. Modelling is an art and should be displayed as such. I particularly like the idea of Harlem Station standing in the middle of the room, basking in light and set up on a well-crafted support. Imagine a billiard table and you’ve got a got idea of what I have in mind. Some cozy, that focus your attention on the layout as if it was a game and where it is enjoyable to spend some quality time operating with friends.

As a backdrop to this, Temiscouata Railway can be seen on the exterior walls, creating a backdrop that wraps around Harlem Station. It would also be carefully lighted and supported by nicely finished storage units.

Now, think about the lighting. Depending on which task you are performing, you can turn on Harlem Station independently from Temiscouata, helping you to focus on what matters.

As a final touch, instead of creating a bland room, large windows will be installed in the new wall so the layout room isn’t simply a box, but rather an environment basking in light and that can breathe. Finishes will probably be painted wainscoting with trims and old colors similar to what was common in railway architecture. Not too fancy, just some character to give personality and warmth to room.

In my modelling life, I’ve seen many modellers that can be considered the best of their trade. Their work is exceptional and breath-taking, however, how many times were I completely flabbergasted to see my favorite work to be literally buried in the most unimaginable mess ever. On the other end of the spectrum, you’ll also find great layouts but display in an aseptic environment basked in monotone fluorescent lighting. A part of a layout success as a lot to do with how we display it, be it in terms of enjoyment, operation and construction.

Wednesday, 3 January 2018

Car Fleet Building Update

As Christmas holidays still continue for a second week, some sizeable progress can be observed on my Harlem Station fleet. As I previously mentionned, the program is plagued by several issues and setbacks, nevertheless, it is still moving forward. Let's take a look at the most recently completed cars.

C&BT Shops SFRD reefers are now almost completed. Paint and details are done, lettering is progressing. The first car was lettered using the old SFRD paint scheme with the slogan and curved lines map. Most of these cars were repainted by 1952, so I decided to get more modern decals to complete the second car. The older one will probably be buried under a generous coat of weathering later.

While we can complain - and I did - the C&BT reefers are far to be the best option available, with some care they can be turned into nice looking models. I wouldn't do it again, but I certainly won't shy away operating them on the layout.


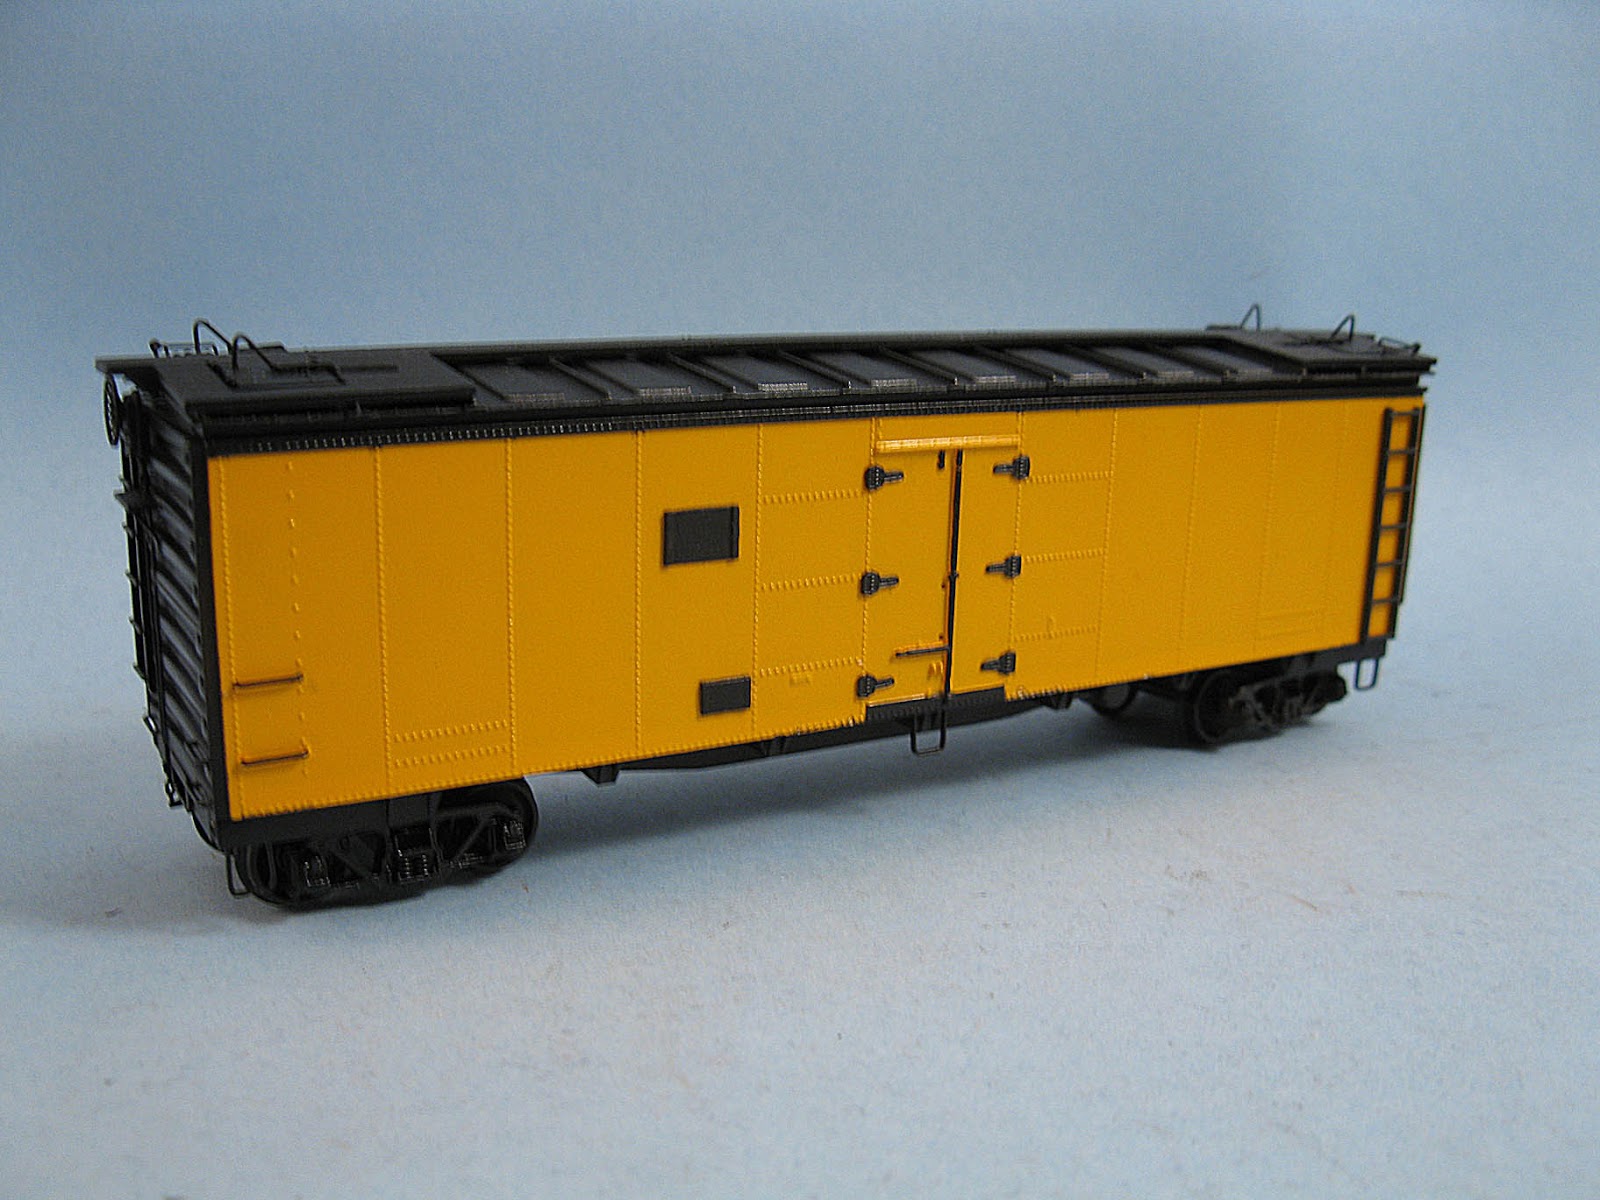
Rapido GARX 37ft meat reefers were build from kits and custom painted. As usual, Rapido did an excellent job with this car. The GARX yellow reefer is lettered using Clover House dry transfer. I tried to modernize the paint scheme to better reflect the early 1950s. However, I believe the word "Refrigerator" should be spelled in gothic font but I couldn't find any useful photographic evidence. At this point, the lettering is not sealed, so I could replace the world by a custom made decal later... which I think would be a good idea.

The second reefer was painted in the attractive early 1950s Swift all-red paint scheme. Unfortunately, I found out the Clover House dry transfer I had was made for the 1954-built steel reefer. Since I model 1952, it's too late for my era, thus I ordered a a suitable set of Champ decals. I expect to letter the car with a mix of decals and dry transfer to better fit the prototype and limit as much as possible the use of Champ decals which suffer from thick carrier decal film.


Kadee PS-1 boxcar is a piece of art. This one started as an unlettered model which I partially repainted and lettered to Erie. Unfortunately, I found out later the 90000 series was built in 1947 by ACF. Thus probably not a PS-1 car but rather a modified post-war AAR boxcar. I could end up stripping the paint and redoing it in another suitable paint scheme later on. By the way, the Erie logo is a homemade decal to replace the incorrect Tichy one.

If anybody has information about Erie PS-1 boxcars, let me know.


The next project are USRA single sheathed boxcars made by Tichy. They are lettered to PRR and Long Island Railroad with doors specifically choosen based on prototype pictures. Very straightforward kits to build.


The last one is a Tichy rebuilt USRA boxcar lettered to P&LE. The car itself is easy to build and looks great, however, I quickly found out the decals were slightly wrong. However, I decided to keep them for the sake of sanity. My only problem with this car was that I didn't thin enough the Future Floor Finish used as a gloss coat before decaling. It resulted in a kind of bumpy surface that made decaling harder. I could have fixed this but I was too lazy... forgetting it would be a real waste of time later... How well!


As you can surmise, they are many other cars on my benchwork right now, but their completion stage isn't worth a mention here.

Tuesday, 2 January 2018

Reefer, Decals, Frustration and New Year

What an auspicious title for the new year! Don't panic, I'm not discouraged at all but trying to be fairly prototypical with a steam era fleet can quickly become a descent into madness... madness I tell you!

The good new is Erie did lease URTX reefers from at least the 1930s up to the E-L merger in 1960. I was able to find a picture of the real wood sheathed 40ft prototype Accurail based their concept on simply by looking at Wikipedia's Union Refrigerator Transit Line entry.

URTX cars on pier 19, East River, Manhattan. 1936 (credit: WikiCommons)
Not only it matches the paint scheme, but Accurail used a fairly prototypical model too. Unfortunately, I have absolutely no idea if these cars were still in service in the early 50s and leased to Erie.

According to information shared by Dave Husman, 16 cars were still on the roster at that time, corresponding to the series leased by Erie:

"The 1953 ORER lists 16 cars in the URTX 27000-27999 series.  IL 32'9", OL 40'11",   Other dimensions are pretty common with most of the cars on two pages of the ORER.  There are no other indications of ownership or assignment (on any of the other series either.)"

Thus, I feel it's better to not bother with theses oddballs. However, Accurail will soon release an Erie steel ice reefer. And that time, it both fits the era and the paint scheme is quite accurate too. But unfortunately, while the artwork is excellent, the model itself isn't Accurate. URTX used the well know steel reefers with the horizontal seam. Often associated with Milwaukee Road, this type of reefer was also leased by Erie. Walthers did produce in the past that specfic prototype and it could be used to create a decent version of an Erie reefer... however, here my rant starts.

Accurail's version of Erie steel reefers (credit: Accurail)

In the world of modelling, either you have the correct decals but not the model or the accurate model exist but not decent decals. I ran into this issue quite a few time over the last few weeks and it can really wear off your best intentions.

In the case of Erie reefers, the lettering was black, so I could make my own decals. In fact, I did start to recreate the artwork based on Accurail's own. But I ran in two issues. Very small lettering is impossible to decipher on pictures (that can be solved with the help of other modellers) and getting a decent Railroad Roman font is almost impossible. Every road had its own variation on that popular style. It thus means I will have, if I continue this project, to redraw individually each letter. I'm used to doing this, but it's a labour of love... Maybe I'm not that much in love with Erie!!! The layout option would be to buy an Accurail model, scan or take a high quality picture of the artwork, scale and clean it, print decals and voilà! That would be efficient thought costly. And the Accurail car would have to be repainted in a correct scheme later...

The other issue is much more bothering. I bought 2 Rapido GARX reefer kits 2 months ago. Built them and painted them. One in yellow to represent a generic GARX (not leased) car and another one to be a red-color Swift reefer. Fine by me, but imagine my disappointment when I discovered my Clover House dry transfer were for the SWIFT steel reefer and not the WOOD one... A little search shown me the Walthers steel reefer of URTX lineage would be perfect for the Clover House transfers... However, I have on hand wood reefer. Thus I thought to myself, let's find correct Swift decals. In all my juvenile naïveté, I felt it would be a walk in the park since Swift red wood reefers are iconic and popular with railroaders. So wrong. Only, Champ offered decals (readily available on Ebay) back in the days. While they seem fairly accurate, these decals are printed on very thick carrier paper, making them less than adequate. I've used them in the past, and wasn't that much impressed. So now, the only remaining option would be to get Champ decals, scan them, clean the artwork and ask some individual or business to print them... That will come with a fairly high price tag.

The most frustrating aspect of this adventure is not the lack of availability. You can't do nothing about that. But rather that I embarked these projects thinking they were simple and fast to complete. Who would believe modelling Swift reefers is so complicated? I did not... Now I know... "and knowing is half the battle won"...

Happy New Year to One and All!


EDIT:


Finally, I decided to rework the decal artwork and tweak each Railroad Roman letter to fit UTRX practice. Two hours later, I'm quite satisfied with the result. White lettering on the black ends could be done using any generic freight data decals and alphabets in Railroad Roman font. Now, if I could know if the Erie Diamond logo had a white background or if it was simply left yellow...


URTX-ERIE steel reefer decals (credit: Matthieu Lachance)

Meanwhile, I found another HO scale ERIE steel reefer artwork (supposedly from Accurail too). This one is dated 1956... The car is orange like the Milwaukee Road ones and URTX full name is dropped while the reporting marks and roadnumbers are painted in a much modern block lettering font. Another foobie? Another variation? Hard to tell, except if digging in an URTX dedicated book.

A mid-50s paint scheme? (credit: Accurail?)

Why not try to reproduce this one too!

URTX-ERIE steel reefer decals (credit: Matthieu Lachance)
As things are standing out right now, I'll simply acquire two Walthers Mainline Steel Reefer, strip the paint and letter them in both 1950s paint scheme. If better information ever come up, it won't be too hard to repaint them more prototypically.

Saturday, 30 December 2017

Help With Erie Refrigerator Cars

While doing research about suitable reefers for the layout era - 1952 - I came upon several refrigerator cars decorated in dubious paint scheme. Most of them were made by manufacturers know for they "creativity". However, a model among many caught my attention. It was the Accurail #4813 kit, which was re-released with an improved paint scheme (mainly the Erie Diamond logo) as kit #4813-1.

URTX-leased Erie reefer (credit: Accurail)
While Accurail is now for their nice quality kits, we all know they apply the paint scheme on their models if it is fairly similar to a real prototype. This isn't criticism toward Accurail because most major manufacturers do that to make their models more appealing to a large crowd. In fact, Accurail generally try to find prototypes that are close enough to not be foobies and generally, their paint schemes are accurate and based on real-life examples.

This is interesting since from that, I can guess the URTX-Erie paint scheme isn't a fabrication, but probably a real thing. However, finding the real prototype cars specification is quite hard. As far as I can tell, the Accurail car represent a reefer built circa 1936. The big question is did Erie still leased reefers in the early 1950s. If yes, were the cars repainted during that period of time. My guess is yes. I have many reason to believe an updated paint scheme wouldn't have mentionned "Ventilated Refrigerator" as this expression was no longer used by railroads by the 50s. Also, the way the dimension data is spelled is quite archaic.

So basically, my questions are:

Did Erie leased or owned reefers in the early 1950s?

If yes, what type of reefer was it (wood, steel, etc.)? Which prototype?

What was the paint scheme or did Accurail's paint scheme survived until then?

Any reference to specific ORER information would be valuable.

Friday, 29 December 2017

Modelling Early Erie Steel Boxcars

An interesting part of Erie's boxcar fleet was their early steel designs which roamed the rails for many decades. They could be tricky to model, requiring extensive kitbashing, but fortunately, within acceptable means we can build them without loosing insanity. The funny thing is decal companies have made many Erie boxcar decals or dry transfer, but focussing solely on the unavailable oddballs.

Fortunately, a few years ago, Dan Hanley ran a 4-part article in Model Railroad Hobbyist (April 2013) to describe how one could recreate a few of the iconic prototypes. I'm certainly not interesting in going to such lenght as casting my own resin cars, but his articles provide enough data to understand the fleet, its history and particularities.

Among Erie's particular choices were Chicago-Cleveland radial roofs, Buckeye ends and Viking roods. I'm certainly not an Erie fan by choice, but it is essential to capture this diversity to better represent the typical Erie freight consist. The most interesting boxcars are all fall into the 75000-76999 series. All steel, 40ft long, with various heights ranging from 8'-8" to 9'-4", they had character.

While I'm completely open to the idea of scratchbuilding Buckeye ends and alter significantly available models, a few readily available models are already on the market and can serve our goal efficiently.

Atlas ARA 1932 Boxcar (credit: Atlas Model Railroad)

The first model is Atlas ARA 1932 boxcar design. This model sports all the correct details for an Erie prototype and capture the flavour of this railroad. Modification aren't required, except if you buy the version with the yellow Erie Diamond logo, which should have been white on these cars. The paint scheme could also be altered to represent the modern Large Diamong logo instead. However, don't buy any Atlas ARA 1932 since they all vary in details according to specific roads. Stick with the ones clearly identified as Erie.

TLT CPR Minibox (credit: True Line Trains)

The second model is quite interesting since it brings us back to 1929, in the all steel boxcar infancy. Back then, very few railroads embraced the new concept put forward by the proposed ARA 1923 40ft boxcar design. Among the pioneers, Canadian Pacific built its famous home variation called the "Minibox". These cars had radial roof and early Dreadnaught ends. However, the sill had tabs and side steel plates were assembled in such a way it eliminated the ARA 1923 flaw of trapping water and rusting.

Fortunately, Erie had almost similar cars equipped with the same roof and ends. However, Erie built them with the infamous straight sill. It thus could be possible to use True Line Trains own's Minibox  plastic car as a starting point and bashing the straight sill. Also, some minor alterations could improve the likeless of Erie's Dreadnaught ends which were marginally different. While not 100%, this model would be both almost pinpoint on overall dimensions and details.

Red Caboose PRR X29 with Dreadnaught ends (credit: Intermountain Railway)

The third option would be to use the old Trains Miniature (Walthers) 40ft steel boxcar with Dreadnaught ends. This is the famoust PRR X29 design. Starting with a Red Caboose kit could also be a better investment in term of quality and prototypicalness. Only the car with Dreadnaught ends would be suitable. Bashing the radial roof would be the biggest challenge, but the straight sill would be "correct". Think of this option as another way to replicate what could be done with the CPR Minibox. It's a matter of choosing your fight! A radial roof could be made in styrene, then cast in resin for ease of replication. I believe it is somewhat easier to alter a Minibox tabbed sill than tackle a fully kitbashed radial roof. However, it ain't that much hard to do with sheet styrene.

To be noted, another easy bash is using Intermountain AAR 1937 (IH 10') boxcar and replacing the roof with a Viking one. Minimal alterations would make it an excellent car to model without efforts.

As you can see, it is quite feasible to build a decent Erie early steel boxcars without reinventing the wheel. Depending your interested in Erie, feel free to you to follow Dan Hanley and go full kitbashing. However, it is nice to see a large array of interesting cars can be modelled with relative ease.

Tuesday, 26 December 2017

Unseen Challenges

People following this blog must think I'm just a crazy guy building cars and never operating the layout... Well... They are indeed right! But hey, model railroading has multiple facettes and car building is probably one I enjoy the most.

That said, building a decently prototypical fleet isn't always a walk in the park. Over the last few weeks, while it was expected some cars would be straightforward, I end up facing several road blocks. I could have thought kitbashing would be hard, but at the end is was only time consuming. However, the worst had to come...

Wrong ERIE decals and reefers without ones...

Among them, accuracy of decal sheets was extremely problematic. By example, I ordered a few Tichy cars with decals. At first, I thought to myself: build the car per instruction and apply the relevant decals. So wrong I was. First, I discovered the USRA rebuilt decals for NYC cars were slightly wrong here and there. Not too much but I had to tweak things a little bit. However, the Pennsylvania decals were as bad as can be. The artwork was smudged and the decal film brittle. I could do nothing with them and thus the car is laying on my desk until I get replacement decals.

Slightly incorrect P&LE lettering but decent PRR and LIRR ones

I also bought a Kadee PS-1 ARR boxcar. Erie did have a few ones and since the car was unlettered and painted brown, it was an easy candidate for lettering. One again, I found out the Tichy decals were wrong. In particular, the font used on the Erie Diamond logo was so off I'm still scratching my head. Fortunately, I have left over from CDS Lettering that will do the job perfectly. But now, many more steps have been added to the process, making it slower again. Some other built date will have to be replaced too.

Remark I'm not complaining. This is part of modelling, particularly when you try to be more prototypical. And while I'm not annoyed, I now better understand older modellers complaining about decals and details. If you care about them, you quickly end up stumbling here and there. The only to do is to sit back, assess the situation and take action accordingly.

Monday, 11 December 2017

GARX 37ft Wood Reefers - Part 2

Among the 20-something cars on my benchwork, the first two are now painted and lettered. While they are not pieces of art, it's quite interesting to see how far you can bring such cheap models. It should also be noted the very spartan GARX revised paint scheme of the late 1940s also contrast with the garish billboard cars generally loved by the model railroading crowd. It helps to bring a sense of reality to the layout.


While I'm quite happy with the detailing, paint job and lettering (by Clover House), I must assess the result to learn from my mistakes.


If I had to redo these cars again, I would address two issues that felt minor at first but have a substantial impact on the credibility of the finished models.


The first thing would be to make the fascia board a little bit narrower. Thought I made sure to measure the fascia on a quality picture with little distorsion, it seems it is to wide. Hard to tell why, by when I painted the roof, it became quickly apparent. A comparison with a Rapido GARX meat ree shell confirmed that. To be honest, I believe the fascia were originally quite large. It was common on old wood car. But visually speaking, it doesn't look right.


A second issue is the roof pitch. I kept the Varney/Life-Like steep pitch since it was the normal thing to do. However, at the end of the day, the roof looks a little bit weird, particularly when compared to similar wood reefer models. I'm not sure if Varney was wrong, but I've seen many older model that got the roof pitch inexact. I'm pretty sure it wasn't. I feel I shouldn't have been lazy and could have fixed that earlier. Oh well, lesson learned!

That aside, the models now look decent. Not great, but OK. With some fading and weathering later, they should blend into the crowd. And while it took me countless hours to get that result, it isn't wasted. I've learned a lot and improved my skills, which was useful when I had to work on other cars. Better, scratchbuilding several parts and trying to figure out the underframe helped me to better understand how real cars are built. This is something you can't learn by simply aping kit instructions.

Monday, 4 December 2017

Kit Manufacturers Comparison or Where's The Fun?

Over the last few weeks, I’ve been working on several freight car kits to build up Harlem Station roster. I had to deal with kits from various manufacturers and thought it would be neat to share my impressions of each ones. It must be noted I’ve built models from these manufacturers for a long time. However, it was the first time I built some much detailed cars in such a short amount of time and with a focus on small details (brake gear, grabirons, roofwalk, etc.).

Life-Like: not a contest winner, but definitely an enjoyable process.

My endeavour started with a pair of Life-Like/Varney refrigerator cars. While absolutely crude, the sturdy and thick plastic used back then proved to be a blessing during the process. It is a sound and solid foundation upon which to one can add details to its heart content. Once again, Tichy details proved to be great to work with while Intermountain brittle plastic was less fun. Accurail AB brake assemblies saved also a lot of time and money. They can be modified too, though I’m not a fan of delrin plastic since I had to use epoxy glue to keep them permanently attached to the car. As much as possible, I prefer to use plastic that can be cemented with solvent. I also used Accurail Bettendorf trucks which are finely casted and affordable. The fine lettering moulded on is a plus to me. I certainly wish Accurail made more trucks. Finally, Kadee brake wheel were a bliss to install. Probably among the best on the market and ones must admit they are incredibly sturdy while having the finest cross section you can expect in HO scale. Overall, kitbashing Life-Like and Varney old train set took a lot of time, but it was a fun process and never tiresome or frustrating. You could almost consider it scratchbuilding since only the basic shell was kept and could have been easily built from scratch with less effort.

The next model I worked on were four Life-Like Proto 2000 Greenville Mill Gondolas. The last time I built this specific car, I was in high school back in 1999 and used a dull X-acto blade and CA glue. I recall the process to have been tedious. This time, sharp blades, solvent cement and tweezers made it much easier. However, the notoriously flimsy stirrups and annoying brake gear are certainly irritating aspects of P2K cars. I decided to order photo etched replacements from Pierre Oliver. However, I must admit the P2K cars are great to build and prototypical to booth. When you know their weaknesses, you can work things around so they are sturdier.

C&BT: Lots of remedial work required and far to be top notch

Then, I decided to tackle a pair of C&BT Santa Fe ice steel reefer. Tony Thompson and Andy Sperandeo once wrote about these cars back in the early 1990s. I thought Thompson was quite harsh when he concluded on his blog they weren’t worth the trouble. But after having spent hours on them, I must admit he was right. The plastic C&BT used is annoying at best. It is brittle and for this reason, many parts had to be oversized. This limitation also made many parts to look coarse approximation of the real thing, even from Average Joe’s standards. I ended up partially trashing the B-end details, the brake gear, ladders, stirrups, hinges, etc… I think you understand the pattern, only the shell was salvageable. But even then, dimensional errors plague the model. The roof doesn’t sit at the proper height and has oversized overhangs. The roofwalk is a joke, many platform brackets not molded.  I also had to alter the roof platform so they be prototypically correct (SFRD platform had long slots so the hatch latches could be dropped into it and not be a hazard for workers).

C&BT: This is an unintentional parody of a brake apparatus

At the end of the day, you end up with a model you need to extensively rebuild, alter and modify. It seems C&BT worked with flawed and insufficient data which made the model an approximation of the car. I can understand the limitation of the early 1990s, but it is quite frustrating to trash almost every details and waste time rectifying another’s mistakes only to get a passable result. When I buy a kit, I generally understand I can build it straightforwardly without having to extensively rebuild it (except if it is the stated goal from the start). I certainly don’t recommend this car, particularly when a vastly superior model is now available from Intermountain.

Intermountain: Flimsy stirrups, but great looking car

I then built two Intermountain PFE R-40-23 reefers. They did a great job capturing the prototype and the building process is quite straigtforward.  However, I’m not a fan of the plastic type favoured by Intermountain. It is quite flimsy for small parts and can easily break during handling. They plastic stirrups are a lost cause. They broke the moment I installed them and I can assure you I used paranoiac care to make sure they would survive. Thus, I ordered photo-etched replacement parts from Pierre Oliver too! But that said, Intermountain cars are generally well-designed and easy to assemble. The instructions are easy to follow too, which is a necessity when dealing with hundreds of parts.


Athearn: With some love, you can bring forward the potential

The Intermountain models then prompted me to update four Athearn 40ft ice steel reefer. Knowing the car was based on the PFE R-40-23 design, I ordered several Intermountain detail parts. I also extensively kitbashed the roof and hatches so they would be closer to the prototype. Using the Intermountain cars as a reference made it quite easier to do. While it required a lot of work, it was a great and rewarding challenge. I don’t regret any minute working on these cars and think they will be a great addition to my layout when completed.

Tichy: Top notch and extremely affordable

Finally, I continued my endeavour by tackling a bunch of Tichy USRA boxcars (single sheathed and rebuilt). Must I say Tichy product have the detail quality of resin kits and the ease of assembly of styrene kits for a fraction of the cost (even competing with Accurail). It is the best of both worlds. The level of detail is incredible and parts are generally free of flashes. Assembly is straight forward, instructions are generally well written and they use a sturdy type of plastic that is both durable and easy to work with.

That wraps up my impression with working with various types of kits available on the market. Meanwhile, I’ll soon have to work with Rapido kits (which are devoid of any instruction), Westerfield and Funaro & Carmerlengo resin kits. While I’m not new to resin kits – having built my share of Japanese garage kit and a Sylvan CN caboose back in my college days – I’m curious to see how I’ll find the experience.

Wednesday, 22 November 2017

GARX 37ft Wood Reefers

Some of our decisions seem stupid when rated in term of efficiency. In this case, rebuilding Varney and Life-Like wood reefers as GARX refrigerator cars may sound foolish, and to some extent it is. However, simply judging a project value – particularly in the case of a hobby – from this perspective is brush over many layers of relevance.

Styrene, paper and brass...

The project started when I found out the general proportions of these models were a good match for 37ft meat reefers - a common lenght for decades in the packing industry - an idea found on Tony Thompson's blog. I had two cars, plenty of trucks and freight car parts that could be used to bring them to life. Dry transfer lettering is also a cheap and convenient commodity. Thus, my mind sought to find a way to make decent models out of them. My guess was that following prototype pictures and Rapido’s own meat reefer official artwork would yield acceptable results. Little did I know that I would venture in quite a quest.

Individually carved wood planks with bolts and wood grain.

Certainly, I can affirm a lot of work was involved. At the end of the day, only the car sides and ends were kept. Grabirons, stirrups, roof and hatches, brake gear and underframe were removed altogether, including door hinges. Someone could argue I would have been better to scratchbuild the damn thing from scratch and save myself a lot of tedious and unrewarding work. That’s probably true… However, I had to use several different techniques and skills to get the results I wanted. This kind of learning will be useful on other more worthy models. Practice makes perfect they say, and you can’t skip that step – even if it may look petty – if you wish to be a better craftman.

I didn't count the exact time it took to upgrade the models, but it certainly occupied me with quality leisure time for a few weeks. At each day, I looked at the models and decided which little detail I wanted to build or improve, taking my time to do the job right.

Correct underframe and brake detail, improved door hinges

This is probably becoming a leitmotiv here on Harlem Station, but I certainly believe working on a small and manageable prototype gives you the opportunity to progressively improve your skills and redo things better as required. On a large layout or project, the imperative of simply trying to complete the project makes it impossible to go back and redo or improve things. The show must go on…


If my explanation isn’t clear enough, think about it in terms of digital video encoding. If you only use a one-pass algorithm, you’ll get a somewhat acceptable result. But as you make a second and a third pass, fluidity and sharpness greatly improve. Depending of your goal, it can or cannot fit your aspiration. But if you want to learn skill and reach excellence in your modelling, this could be a good way.

In my case, I’ll continue to upgrade older freight cars, as they are an excellent way to improve oneself and spend some quality leisure time.

Tuesday, 31 October 2017

Reefer Colors in the Acrylic Era

Finding the right color for freight car can be a real pain, and I'm not talking about the intricacies about boxcar red.

One of the worst color for me so far as been to find a correct orange reefer in acrylics. I've looked at many conversion charts and I'm certainly full of doubts, particularly for FGE and SFRD refrigerators cars of my era (late 40s-early 50s). While I've seen paint labelled as Orange Reefer, many modellers aren't convinced of their accuracy.

Actual pictures show us FGE reefers were kind of light orange closer to a dark harvest yellow than pumpkin orange. The same could be said about SFRD cars, which always have a kind of yellowish color though it seems FGE and SFRF had their own specific paint color.

Among suggested color, Microscale suggest Gunze Sangyo #109 Character Yellow as a substitute for Floquil PFE LightOrange. They even suggest Humbrol #18 Orange, which is quite a saturated orange shade a little bit over the top for SFRD reefers.

While many manufacturers now offer "Reefer Orange", I'm not that much inclined in testing a few of them only to be disappointed. Not all reefers were born equal and I'm pretty sure painting these cars is much more than just spraying some random stuff out of the bottle.

Thus, if anybody have suggestion on acrylic paints that can be airbrushed and suitable for FGE and SFRD car, feel free to comment. In the past, I wouldn't have minded and mixed my own custom color. However, as I'm building several cars at different moment, I'm not eager to have huge discrepancies among the fleet.

Edit: Reading again articles by Tony Thompson and others, it seems SP Daylight Orange would be a close match for PFE Light Orange reefers. Only need to find a correct color for the SFRD cars.

Monday, 30 October 2017

Kitbashing Erie 37500 Series Gondola - Part 2


Everyday we learn a new thing – at least we should – and modelling is probably a good teacher in that regard. While working on my pair of Erie 37500 series gondola I got a lesson where I expected it the less.

As a starting point, I’m using the old Roundhouse 40ft gondola. Some will object it’s a crude model by today’s standards but details are crisp and the number of panel fit the Erie prototype I’m trying to replicate. Certainly, there are some discrepancies in length, but this high side gondola fits decently the bill. My approach is to make it more credible by installing wire iron grabs, A-line metal stirrups, improving the braking gear, replacing the trucks, thinning down some section profiles and redetailing the bare interior. In short, it’s a typical rolling stock improvement project that should take a few evenings to complete at a leisure pace.


The problem arose when I made a new steel deck with hand-punched rivet details. I was quite proud of my work and thus decided to glue it on the bottom of the gondola. My first idea was to simply secure the bottom with a few drops of CA glue, however, the rivet punch process slightly warped the thin styrene sheet and I was afraid this could impeded the bond. Thus, I decided to simply brush a generous amount of solvent-based glue on the gondola and cement permanently the new deck. At this point, all was fine.

However, on the next evening, I found out the car sides had badly warped toward the interior and by a large margin. Using my hand, I carefully pressed the warped parts outward by applying a certain amount of force. I thought the sides were affected by the glue bond at the perimeter of the new deck… But imagine my surprise when the next day, the car sides were once again badly curving inside. Not only that, but now the deck itself was sagging the middle. It didn’t take long to find out the problem. The gondola bottom had warped significantly due to the solvent used to cement the new deck. When I installed the metal underframe, it no longer sat on the plastic shell but rocked on the curved bottom impeding the trucks movements. Big problem!!!

What happened was a simple and well-known phenomenon. When laminating two different materials, they have a tendency to warp when both have different characteristics. Generally, the process takes some time and is gradual. In my case, the generous use of solvent softened the plastic to the point that when materials hardened and cured in the following hours, their different rates of contraction created a disaster. The result was predictable to some extent, but little did I know a 1 mm bulge would manifest itself in such a spectacular way.


At this point, I was able to straighten the gondola sides. However, the only practical solution to repair the warped bottom - which should be better described as a belly - was to shave down the bulge with a chisel. It surprisingly went well, but it certainly didn’t address how badly warped the steel deck look. If it was a wooden gondola, I wouldn’t care since these cars were generally badly warped and sagging in old pictures. Unfortunately, steel cars generally keep their shape better.

From there, I had two options: try to fix up the deformation or simply cutoff the car bottom and replace it with a brand new one. In both case, it was a question of releasing the built up stress in the plastic. While at first I was leaning toward a full reconstruction, my long experience with resin figure garage kits kicked in. I plugged the hairdryer, set it to maximum heat, and applied evenly the hot hair on the car. I made sure to soften the plastic until it was malleable but was carafully enough so details start to molten. I didn't keep track of time, but it was less than a minute. When the car was soft enough to be reshape, I put it bottom up on a flat surface and gently pressed down the belly uniformally. When the shape was restored, I kept pressure until the plastic hardened again. As expected, the gondola sides straighened and the bulge disappeared once for all.

24 hours later, both cars were still keeping their shape thus I resumed the redetailing process. I was also a good occasion to address will laziness toward molded on ladders. At first, I'd planned to remove them, then decided to keep the ladder and save myself a tedious task. But after all the effort put on the cars, it was silly to still keep clunky ladders. I heard the voice of reason, took my chisel blade and scrapped off the unwanted details.


While I was able to repair my horrible mistake, I've learned my lesson. Next time I face a similar challenge, I will superficially glue the new deck with non-solvent based cement to eliminate altogether the risk of warping. I’m certainly not proud of myself for what initially seemed to be a well done job. Once again the old rule applies: use as little glue as needed. 


For some reason, we have a tendency to believe styrene is a stable material compared to wood or cardboard, but this is far to be true. Styrene (and other plastics) is surprisingly  vulnerable to warping and I've seen more than my share of projects going awry in a matter of days or weeks.


But enough about mistakes... The rest of the project was relatively straight forward, involving a new Accurail gondola brake apparatus, retainer valve and details from Tichy and a Kadee brakewheel. I went as far as adding the fulcrum and installing a bracket for a cut lever. Also, riveted steel straps were added inside the wall of the car as it did exist on some gondola. It was to reinforce the impression this is a real steel car and not a one piece injection-molded shell.

The goal is simple, these cars, even if they are prototypically accurate should at least have the same level of detail as a Proto 2000 or an Intermountain car. My reasoning being discrepancies in details are much more noticeable than overall accuracy. The model should look like a real car and have the basic features. From that point on, sky is the limit.